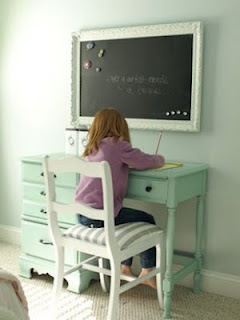
Where are we going to draw? Here are a few ideas that you can do with chalkboard paint.
 |
| Photo Credit: shine.yahoo.com |
Chalkboard Dresser
What a beautiful and great idea! This is a piece of furniture that can grow with a child. You start off labeling the drawers for their clothes and as they get older you can put little "booster" sayings like, "You are great!"
 |
| Photo Credit: shine.yahoo.com |
 |
| Photo Credit: Designsponge.com |
What a beautiful and fun way to learn geography! I really like this idea and what a great way to re-purpose an old globe! I also love that the supply list is short. You need two colors of chalkboard paint, a one inch brush, a thin liner paint brush, a paint color to outline the continents, chalk and a globe. Click on the link to take you to the project instructions.
 |
| Photo Credit: bgh.com |
If the traditional black and green chalkboard colors do not work for you or your decor it is possible to make your own custom color. Just use the ratio of one cup of latex paint to 2 tablespoons (Tbsp) of unsanded tile grout. Use a paint stirrer to mix. During application, gently sand the dry layers of paint between coats with 150-grit sandpaper. Apply several coats for best color.
Now it is time for some chalk! First lets look at how to make your own chalk.
 |
| Photo Credit: ohmyhandmade.com |
This recipe makes beautiful sidewalk chalk using Plaster of Paris and tempera paint. This is a fun craft idea and a great way to get the kids involved!
 |
| Photo Credit: kinderart.com |
This is a great idea of smaller children. You take chalk and dip it either into white tempera paint or glue and color with the chalk. It creates a different effect that you traditionally see with chalk and the paint/glue help to affix the chalk to the paper.
I LOVE this idea and it is SO easy to do! You take salt and place it into a zip lock bag along with the color of chalk you want to shade the salt. Have the children rub the salt and chalk bag until the salt is colored. Pour the salt into bowls. Have the children design a picture and let them fill in small portions of the picture with a thin layer of glue. Sprinkle the colored salt on the picture. Continue working section by section until the picture is complete.


No comments:
Post a Comment